- Most Michigan Engineering classrooms offer the ability to stream live via Zoom on a computer located at the instructor’s lectern.
- Streaming is separate from a room’s built-in lecture capture service, but both can be used simultaneously.
- Using the computer in the room to stream allows instructors to take advantage of the built-in whiteboard cameras and wireless microphone systems.
- An introductory video and step-by-step instructions are provided below, and further assistance can be requested by contacting CAEN.
Video Overview
Step-by-Step Instructions – Click Images to Enlarge
Note: Streaming live is separate from the room’s built-in lecture capture service. If you request a lecture recording for your class, that will still run as usual, and students will be able to watch your lectures on-demand afterward.
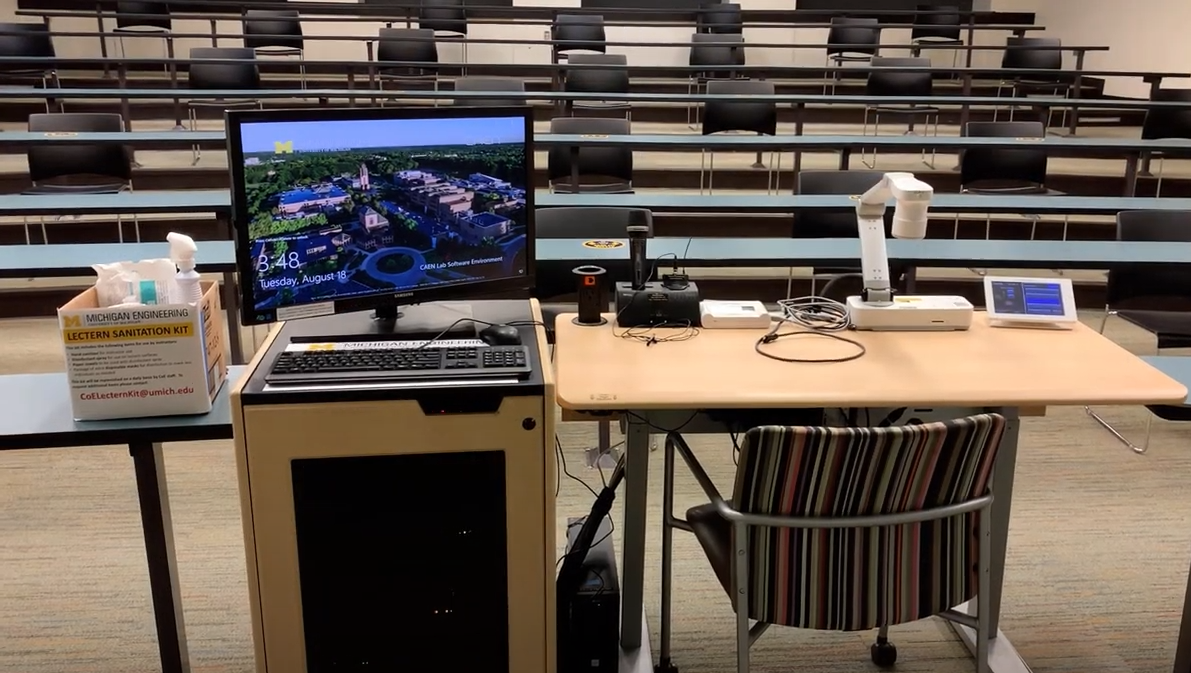
If you need to stream your lectures live from an Engineering classroom, this can be done using the PC next to the instructor’s lectern. While you have the option to stream from your own laptop or tablet device, using the lectern PC will take advantage of the built-in cameras and wireless microphone systems in the room:
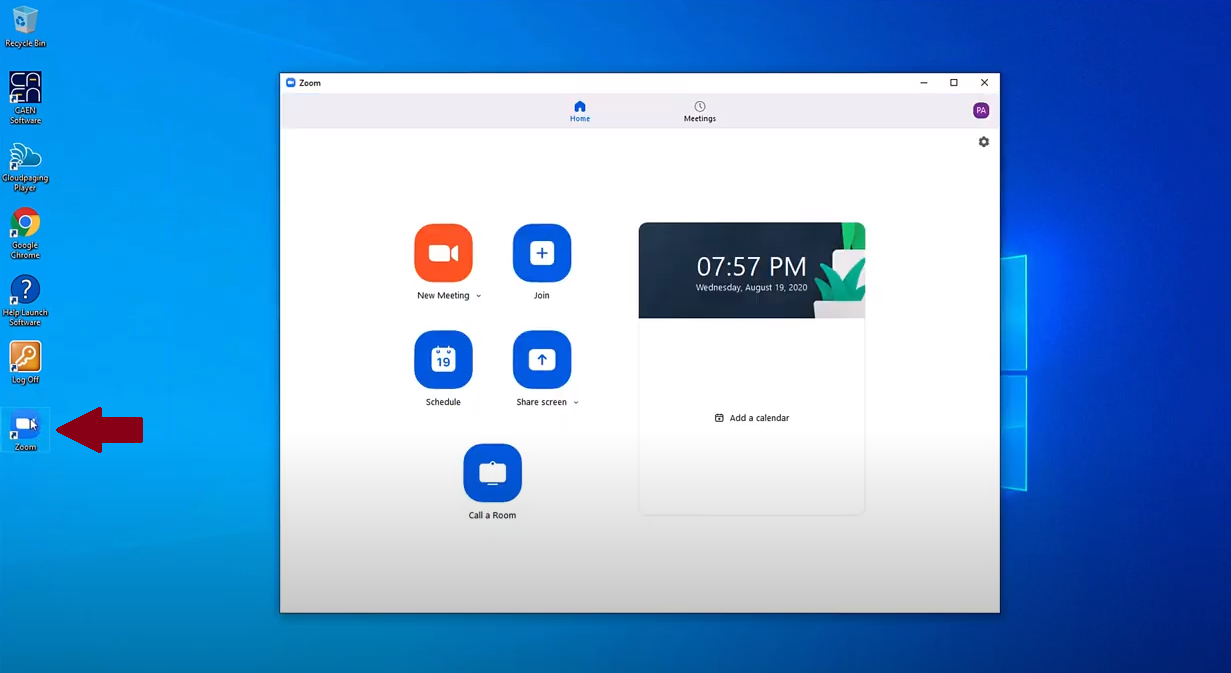
Log into the PC using your U-M credentials. Once you see the computer desktop, launch the Zoom app to sign in:
Note: For step-by-step instructions on logging into Zoom, refer to our article: How do I log into Zoom on the PC in an Engineering classroom to begin streaming my lecture?
Once you are logged in, start the Zoom meeting you previously scheduled for your class. Note: This means you will need to share the link for the Zoom meeting with your students prior to class. Many instructors post the link on their course’s Canvas site or send it out via email using the Canvas Announcements feature.
If asked, choose to Join with Computer Audio:

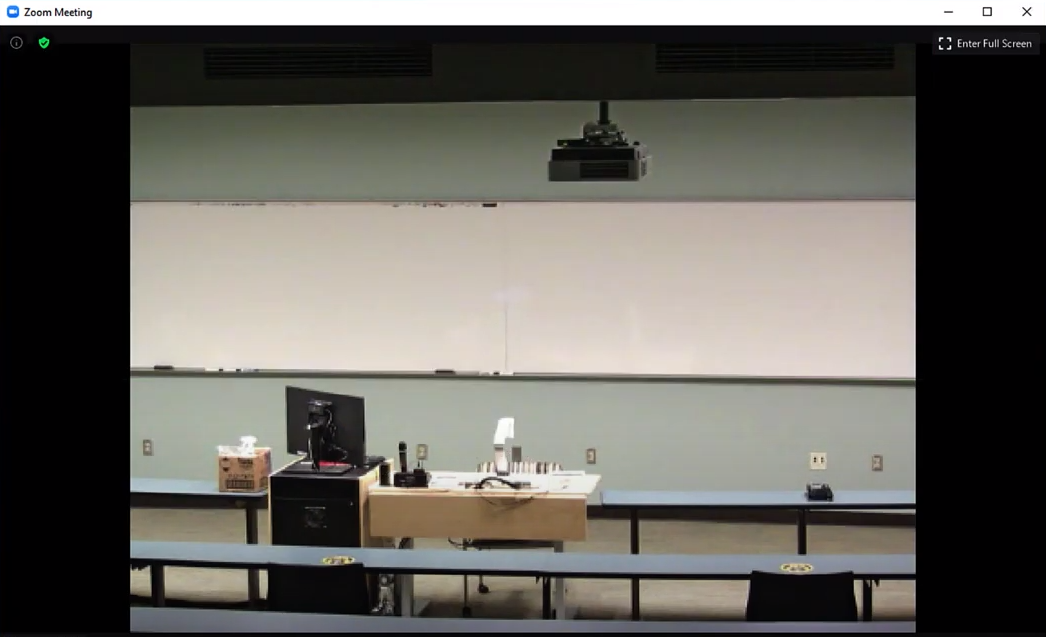
You should then see video from the room’s camera, and the microphone and speakers will automatically be enabled:
If the intended video or audio source isn’t selected, you can change it using the respective icons and arrow menus in the bottom-left corner of the Zoom screen. There’s one to Stop/Start Video and one to Mute/Unmute:
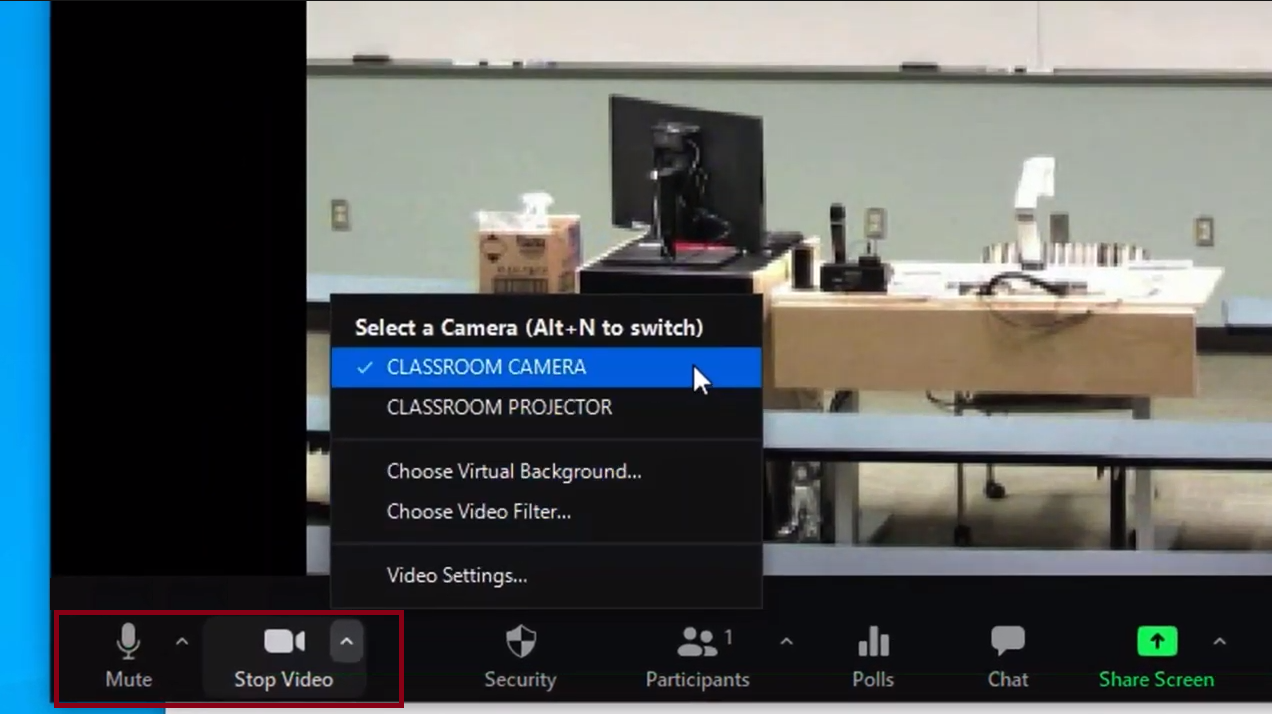
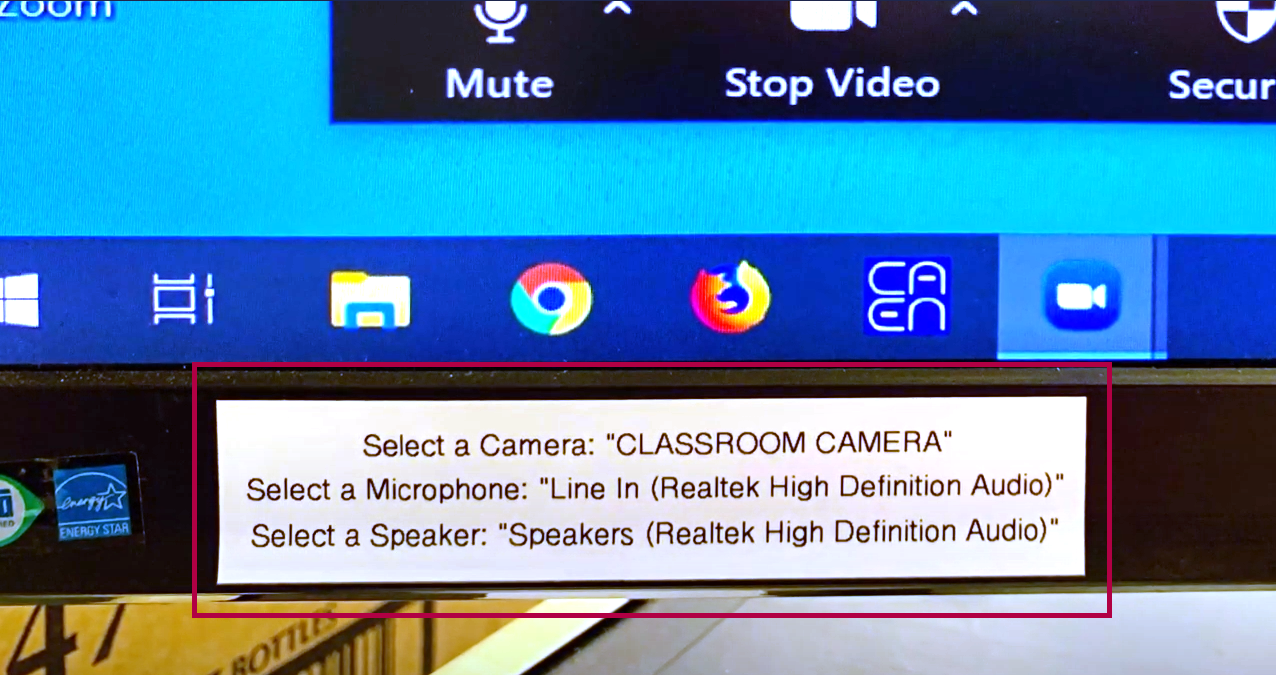
There’s also a sticker on the monitor listing the names of the camera, microphone, and speakers appropriate for the room you are in:
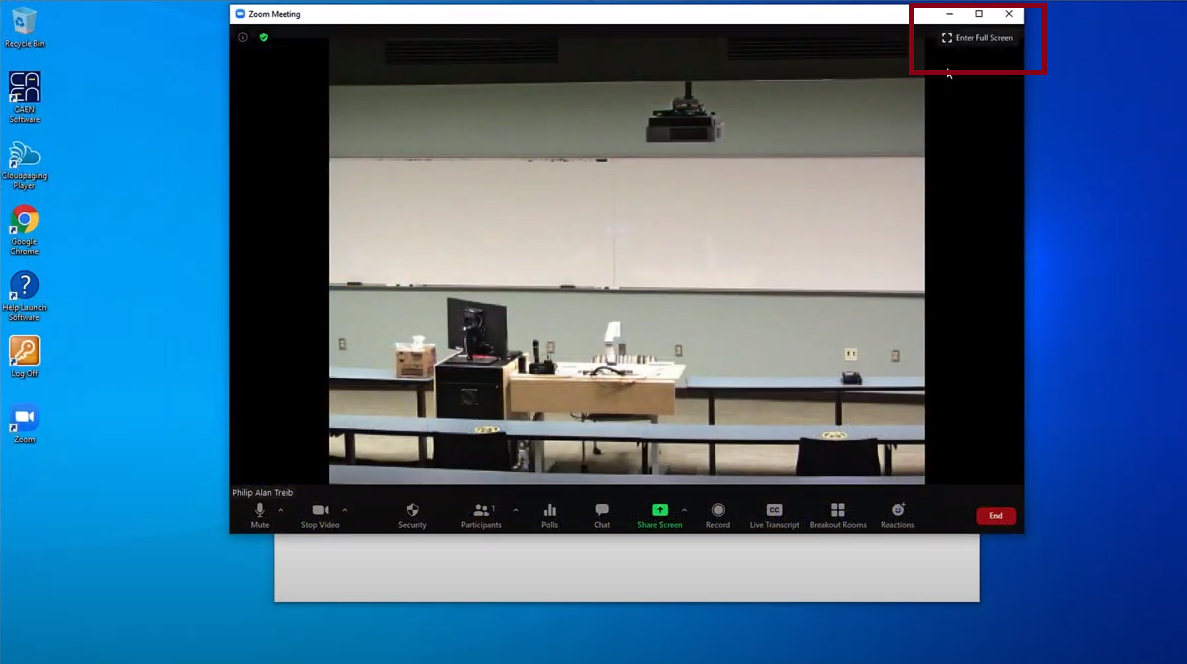
Note that when presenting, you can press Enter Full Screen in the upper-right corner of the Zoom window to fill the entire display:
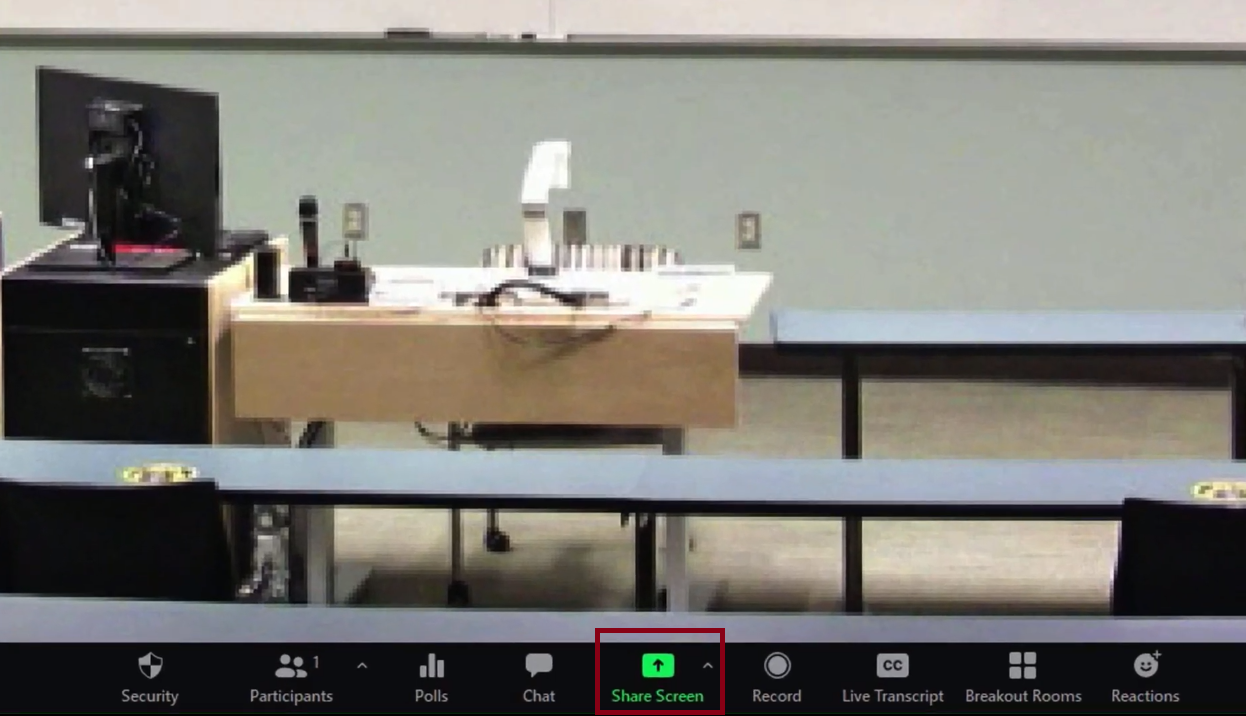
If you plan to show content on the projector in the classroom while streaming via Zoom, you can use the Zoom screen-sharing feature to send the feed. To do this, click the Share Screen button:
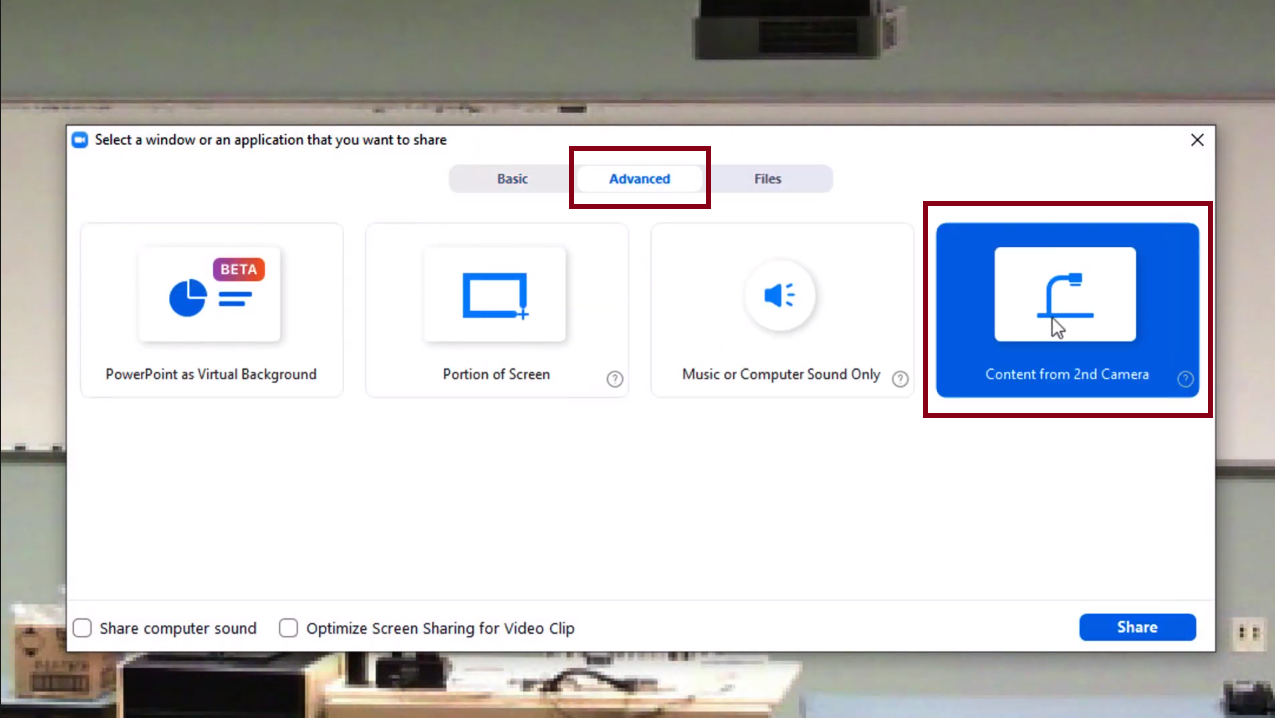
In the resulting window, click the Advanced tab, and select Content from 2nd Camera:
From this point, you can use the room as you normally would, and it will all be streamed to the remote students via Zoom.
While streaming, you can select any source using the touch panel on the lectern, and it will be shown both on the display in the room and to any remote students. You can also use the touch panel to adjust the camera view:
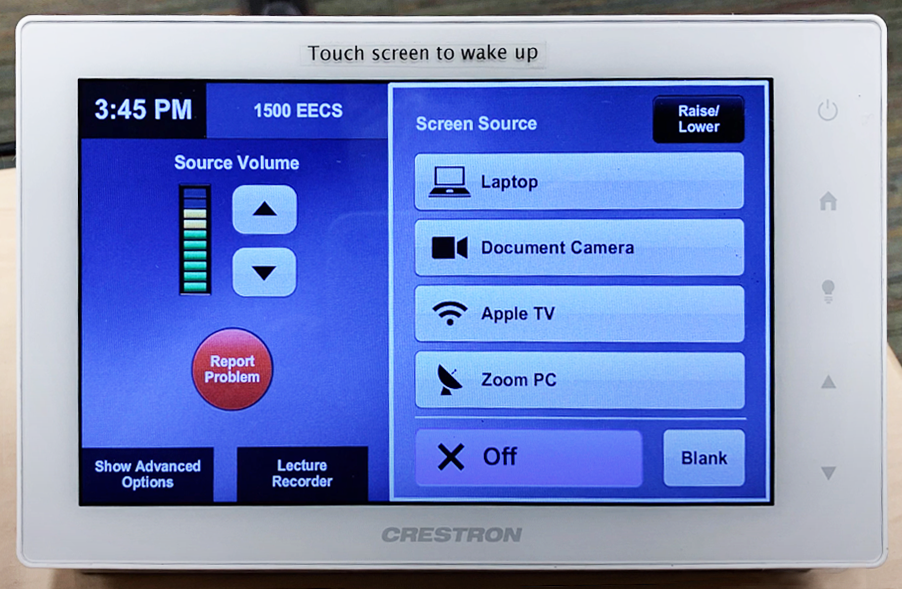
You should see a Zoom PC source on the touch panel in most rooms. This option will show the lectern computer’s display on the projector, which can be useful in cases of remote guest lecturers.
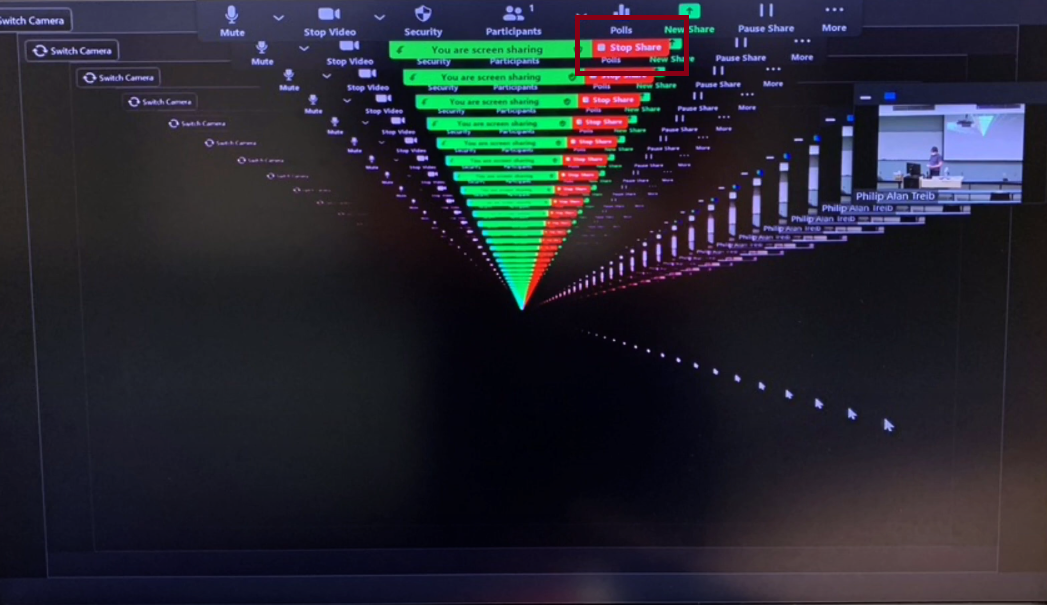
You can also use the same camera as the room’s lecture capture system. Press the Lecture Recorder button on the touch panel to bring up the camera controls and move the camera as desired. If you select this, though, make sure to turn off Screen Sharing in Zoom, otherwise, you may get a tunneling effect on the video display:
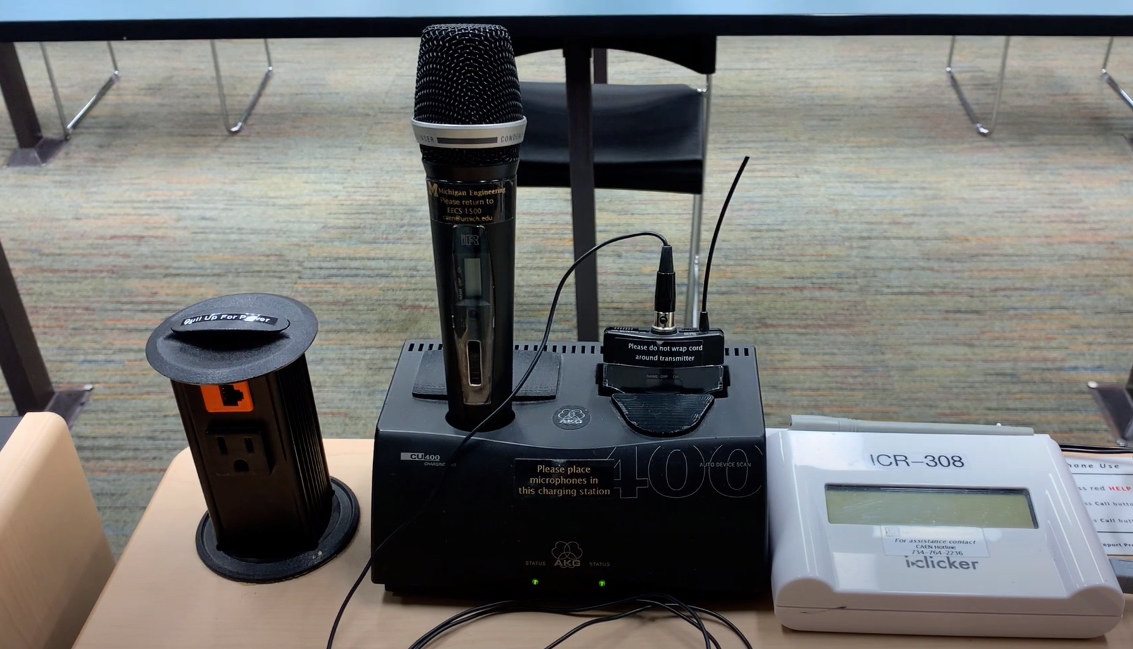
Note that for best audio quality, use the wireless microphone system located on the lectern. When finished, please turn it off and return it to the charging base so it has power for the next time you need it:
Finally, when you are finished with your class, please make sure to log out of the Zoom PC so the next instructor can log in.
If you have any questions about live streaming in a Michigan Engineering classroom, please contact [email protected].